Hey Emma,
you’re on track: you can indeed simply adapt cfg.design.train and cfg.design.test to create a split-half design, but it seems you mixed up the dimensions.
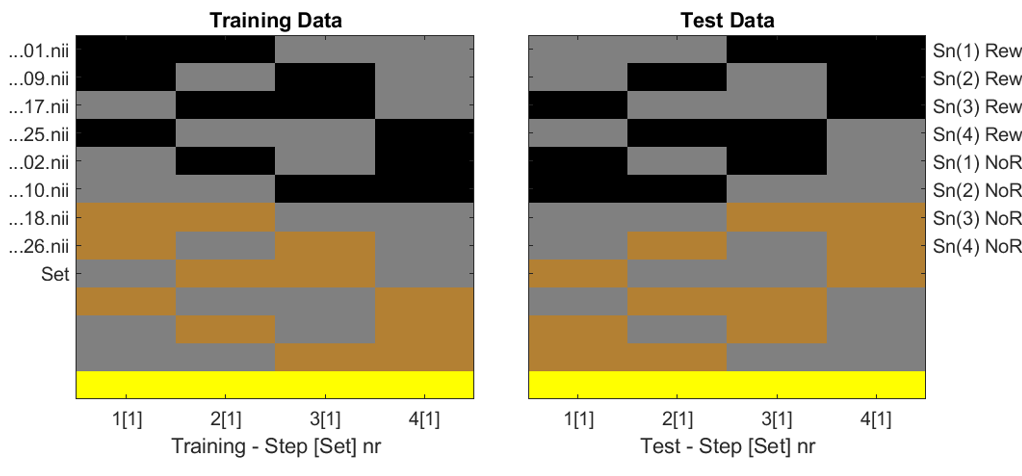
In your example you have 8 images for classification, 4 per run. The typical split-half design is to first train on all data from odd runs and test on all data from even runs, and then switch training and test set.
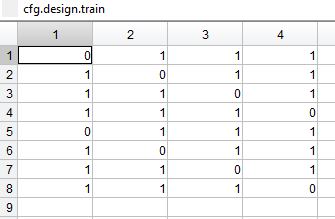
Thus, a split-half design would need .train and .test 8x2 matrices (8 betas, 2 “steps”).
You can either create these manually, e.g. by setting
cfg.design.train = [
    1 0;
    0 1;
    1 0;
    0 1;
    1 0;
    0 1;
    1 0;
    0 1]
cfg.design.test = [
    0 1;
    1 0;
    0 1;
    1 0;
    0 1;
    1 0;
    0 1;
    1 0]
Note that you also need to adapt the matrix cfg.design.label, because this also contains one column for each step. Because the labels are always the same per step, you need to just keep the first two columns:
cfg.design.label = cfg.design.label(:, 1:2)
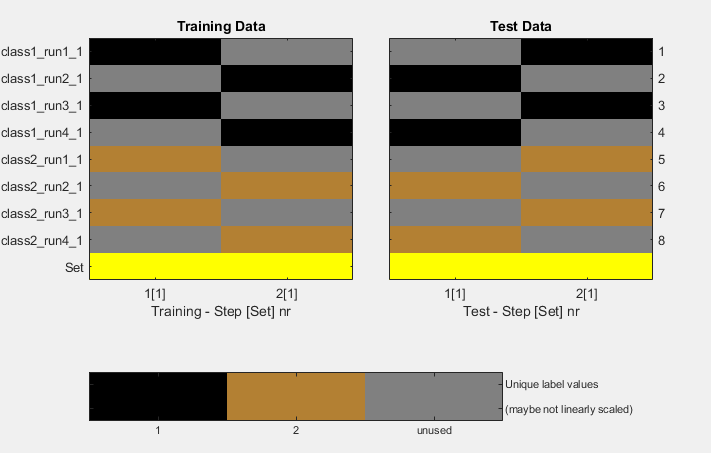
However, a more general way to create the cfg.design.train and .test matrix would be the following, in which we first determine which data comes from odd runs using the modolo (mod) function and use this for the first .train column, then invert this to get all data from even runs for the second column, and then invert the whole .train matrix to get all left-out data as test. Finally we again reduce the .label matrix to two columns. Note the difference between cfg.files and cfg.design
% create a odd-even split-half decoding design
cfg.design.train = mod(cfg.files.chunk, 2);       % step 1: train on all odd data
cfg.design.train(:, 2) = ~cfg.design.train(:, 1); % step 2: train on all even data
cfg.design.test = ~cfg.design.train;              % test on left-out data in step 1 and 2
cfg.design.label = cfg.design.label(:, 1:2);      % same shape for design.label as for .train and .test
Hope that helped?
Best
Kai